Tuesday, February 24, 2015

DIY Coffee Mug Candles by Glitter

Do you ever have those tea light candles just laying around your house, with no candle holders? Well here is something really cute you can try at home with things around your house! These mugs, tea lights and coffee beans cost me a total of $0, because I had everything in my house! However, if you were need to go out and buy the supplies it will cost you under $10.

What you need:
Mugs
Tea Lights
Coffee Beans


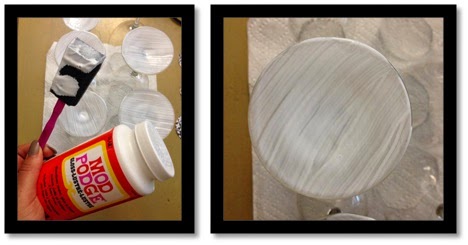
Step 1: Make sure you wash your bowls/cups out, set them down and either air dry or towel dry.

Step 2: Pour your coffee beans into each bowl/cup. I just eye-bawled the measurement and levelled them out.

Step 3: Then just put your tea lights in the coffee beans. As you light each candle, the aroma of the coffee beans will come through and smell amazing! If you wanted to try something a little bit different, with a different scent you can always get the flavoured coffee, and try flavours such as vanilla or hazelnut to give a different aroma!

This very simple DIY gives a personal touch to every home, and fills it with a beautiful scent! It only took a few minutes to do, but will last quite a while! So try this DIY, send in your pictures of how you placed your coffee bean candles around your home and comment below! 

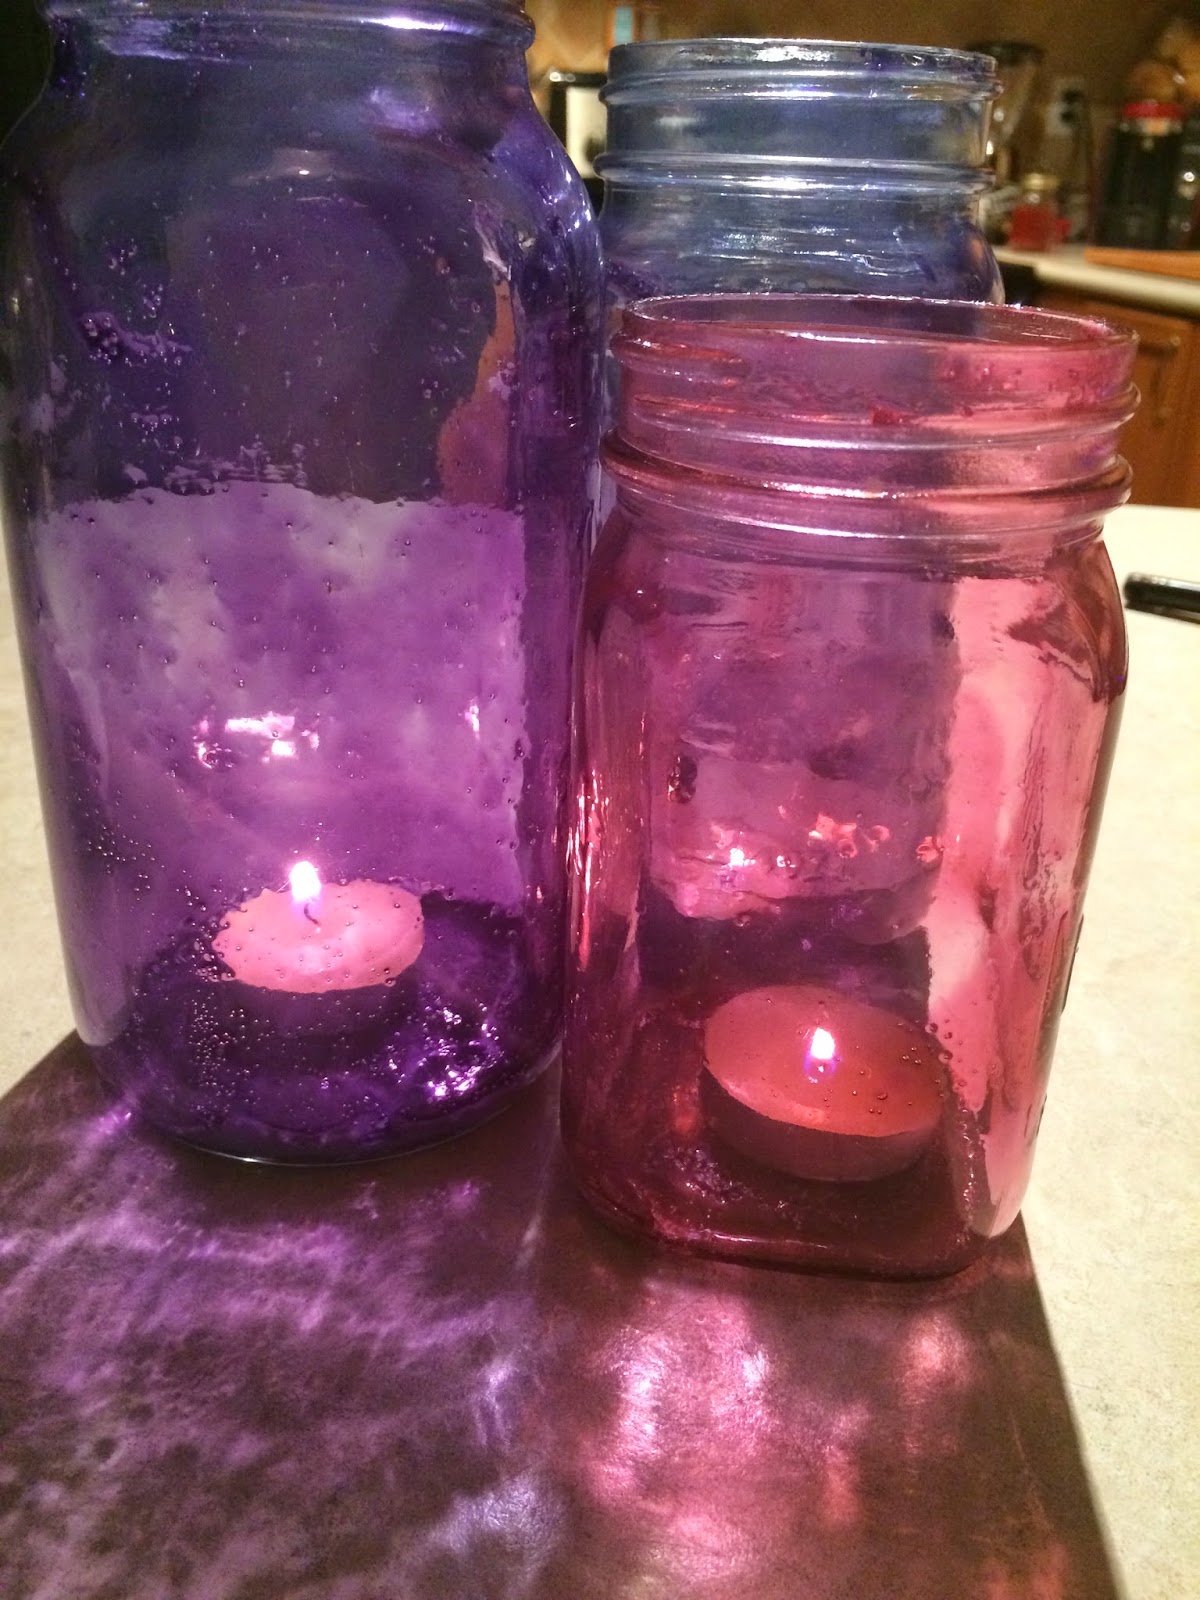
Something else you can try, you can combine both of our blogs from this week and make the marble design on each coffee mug and pour in your coffee beans and tea candles in to add a little more fun and dynamic to both DIY'S!


DIY Watercolour Coffee Mug Using Nailpolish by Glue

What you need:
  • 2  bottles of nail polish
  • toothpick
  • container
  • warm water
  • ceramic mug

This DIY project is super easy and takes only a few minutes. Not only is this watercolour technique a cool  way to add some pizzazz to boring old white mugs but they also make wonderful inexpensive gifts for friends and family.


Start by filling a deep container with warm water (not hot!). Have both of your nail polishes open and ready because this next step needs to be done quickly or else the polish will dry. Choose colours that will create a two tone affect and complement each other.  Tap a few drops of your first colour into the container and tap the bowl lightly so it spreads. Then tap in a few drops of your second colour. Use your toothpick to gently swirl the polish to make a design. Now carefully lean half of your mug into the water for a few seconds, lift it out and let it air dry by placing it on a kitchen towel upside down. It is completely up to you how much colour coverage you want on your mug. I created three different styles because I like how they look together. For less coverage tilt your mug on more of an angle so that it does not come so close to the rim. The mugs may take an hour to dry completely.

I made a set of three watercolour coffee mugs the same colour and then experimented with two more colour pairings. You can view the nail polish colours I used to get an idea of what pairings you like.

I recommend that you hand wash these mugs because they do not hold up well in the dish washer.


Tuesday, February 10, 2015

DIY Face Mask by Glitter

Do you ever want a nice natural glow to your face? Do you find the products in stores are always too expensive for too little product? Well here is something for you! I use this face mask once a week, and I find my pores to be smaller, less blemishes, softer skin, and a nice natural glow!


What you need:
  • Egg whites
  • Honey
  • Bowl
It's very simple and you can do this at night, or in the morning once a week. We advise not to do it all the time or else it can dry out your skin.

The egg whites will allow your pores to minimize keeping out dirt that causes acne or blackheads, as well as tightening your skin which eliminates extra oils. As for the honey it moisturizes the skin and leaves it with a soft, silky feeling.


Step 1: I crack the egg and separate the egg whites and the yolk. Just by cracking it and passing the yolk back and forth to each half of the egg shells and the egg whites just fall right into the bowl.

Step 2: Next I take my honey, and I warm it up for about 10 seconds to get a faster consistency and so it comes out much faster. Because I put two egg whites, I put two tablespoons of honey.

Step 3: Mix up the egg whites and honey together, and there you have it! Your very own, inexpensive, face mask!


Now for the application part of it, make sure you tie your hair back to not get any of the mixture in your hair. Then just start applying the mixture with your hands all over your face. (Be sure to avoid your eyes!). It is not the most comfortable feeling to put egg whites and honey on your face, but trust me it is worth it! Now just wait about 5-10 minutes until your face mask begins to tighten and dry up, and the last thing you do it wash it off with warm water and be sure to get all of it off. What I like to do and I recommend to you guys is after washing your face with the warm water, wash with really cold water and that will close up your pores and keep your face feeling fresh!
Comment below and gives us feedback of what you thought of this weeks blogs! We love to hear from you and wanna hear your great ideas!

DIY Valentines Day Man Bouquet by Glue

Valentine's day is around the corner and it is always so hard to find an appropriate gift for a guy. Seeing as how there aren't very many male flower lovers out there I thought this idea was so perfect. A man bouquet is a sweet gesture and it won't break the bank. This gift is also very customizable so you can change it up to meet the liking's of any man.

What you need :
  •  glue gun
  • glue sticks
  • green masking tape
  • green tissue paper
  •  styrofoam ball
  • plant pot
  • wood skewer sticks
  •  scissors

Items inside the bouquet:
  • Hershey's
  • Snickers
  • Kit-Kat
  •  M&M's
  • Canadian Club Whiskey (mini)
  • Polar Ice Vodka (mini)
  • cigar
  • 5 heart shaped chocolates
  • 2 Kraken black spiced rum (mini)
  • 3 lotto scratch cards
Step 1:Lay out all your items. Match the number of skewer sticks to the number of items. (Note: For larger items like the whiskey and vodka you may need two sticks). Try to visualize how you want your items arranged in the man bouquet. It helps to draw out a rough sketch on paper. Items in the front should be shorter so adjust the length of the stick by cutting it.

Step 2: Cut a piece of tape an inch shorter than your skewer stick, place the stick on the edge of the tape and roll it, leaving the pointy side uncovered. Do this to all of your sticks. They should resemble green flower stems like this.

Step 3: Heat your glue gun, place each of your items face down and glue a stick to the back of each. Put the items aside to let the glue dry completely.

Step 4: Squirt a big blob of glue at the bottom of your pot, scrunch up two pieces of tissue paper and secure them to the bottom of the pot. Cover half of the Styrofoam ball with hot glue and firmly hold it in place inside the pot. This is so the ball doesn't spin around or tilt.

Step 5: Now you can add all your items to the bouquet. Refer back to your sketch so you aren't blindly stabbing the ball with skewer sticks. Start with the larger items and then add in the smaller ones. You can adjust the height of the stick by pushing deeper or less deep.

Step 6: Weave the green tissue paper through the sticks to cover all traces of the ball and glue in place. Lastly, heavier items like the spiced rum glass bottles that can't stand on a stick, can stand alone on the tissue paper.

There you have it! Your very own man bouquet that he will love and appreciate for Valentines day, that doesn't break the bank or scream sappy!
Remember you are not limited to booze and chocolate!
You can also try:
·         beef jerky
·         pictures
·         rolled up socks/boxers
·         cards
·         giftcards
·         gum
·         tools
·         deodorant
·         mini cologne
·         razors


Tuesday, February 3, 2015

DIY Lava Lamp by Glitter

Here is something fun to do with your kids, or little siblings! Keep them busy and involve them into making a DIY homemade lava lamp! It'll bring you back in time to when they were cool, however it'll fascinate the little ones into making one, and allow them to help! Now just follow these simple steps and you will have your very own, easy, and cheap lava lamp!


What you need:

A Tall Glass or Plastic Bottle with a Lid
Salt or Alka-Selzter Tablet
Vegetable Oil
Food Colouring 
Water
Measuring Cup or Spoons


Thats all you need to make your homemade lava lamp! You can find these items within 5 seconds in your kitchen, so you don't even have to spend any money! Only thing I decided to buy was the big glass water bottle, just because it would make it a little more appealing, and that only costed me $3.99 from the grocery store. Let's get started!

Step 1: Get all your materials together, and clear off your table so you have more room space for all the kids to watch and help you out!

Step 2: Fill up your bottle with about 2/3 with the vegetable oil, and the rest with water. Be sure to leave about an inch of room from the top.

Step 3: Then drop in your food colouring. I used red food colouring and I put quite a bit because of the size of the bottle. Because we put the oil, and then the water, allow the food colouring to sink to the bottom to get to the water to colour it.


Step 4: Now drop in your salt, or broken up alka-selzter tablet. I used sea salt because I was unable to find the alka-selzter tablets, and because it is not as fine as regular table salt. I ground up about a tablespoon of salt into the measuring cup.

Step 5: Tightly put the lid back on the bottle, and now you can turn the bottle upside down and see what happens!


Now you can see all bubbling, and hear the oh's and ah's from the kids! They will be so excited to make their own lava lamp, and it gives them something to look at for a little while!

Try this DIY for the upcoming long weekend! Send us your comments, questions, and we are always looking forward to seeing your own DIY's!


Jewelry Box DIY by Glue

This is a pretty and fun DIY project that is good all year round. Feel free to let your daughter or niece get involved to make their very own Jewelry Box!

What you need :
  • wooden box
  • all purpose acrylic paint
  • paintbrush
  • sheet of scrapbook paper
  • large cotton shirt (plain) or fabric
  • glue gun
  • scissors
  • pencil
Step 1: For this project I purchased a simple wooden box at Dollarama for $3. I used all purpose acrylic paint to paint the box turquoise, leaving the inner bottom base unpainted . Don't worry about getting paint on the metal latch because it can be easily removed with nail polish remover after it dries. Let the box dry for a few hours, preferably overnight.

Step 2: For this step you can either go out and purchase fabric, or you can work with what you have like I did. I used a big ol' pajama shirt. Measure the  width of your box interior. Cut out even squares of fabric that are the same width. The amount of pieces will vary based on the size of the box.

Step 3: Fold each individual piece of fabric in half and roll it. Stop when there is half a cm of fabric left, add a dab of glue to the end and continue to roll. This is to keep it from unraveling. Place the rolls of fabric in the box until the bottom is completely covered.

Step 4: When the base of the box is completely covered and meets your liking's  take out the fabric rolls and use the glue gun to glue down each roll side by side. Ensure there are no spaces in between.

Step 5: Now to give your box some personality you may want to add a pattern inside. To do this trace the bottom of your box onto the scrapbook paper with the pattern of your preference, quite obviously I have a thing for damask  patterns. Once you have traced the shape of your box, cut it out. This cut out will be too large to place into the interior top half of your jewelry box so keep cutting around the edges following the outline until the shape is the right size.

Step 6: Use the hot glue gun to glue the scrapbook paper cut out into the top half interior of your box as shown below. I kept my box exterior simple but you can bedazzle your box however you wish. If your making it with kids glitter and sticky crystal studs are always a good idea.

Step 7: Place your sparkly studs and rings inside and enjoy your new jewelry box!!

Tuesday, January 27, 2015

Valentine's Day Letter Box DIY by Glue


With Valentine's day right around the corner this is a cute DIY gift idea for a special someone!

Warning: This gift is extremely cheesy and requires a lot of heartfelt writing.

What you need:
  •  Printed card stock paper
  •   Double sided tape
  • Scissors
  • Box
  • Tissue paper
  • Avery square labels (2 inches)


How to make an envelope:
Step 1: Choose a sheet of cardstock paper with the pattern of your preference. Ensure the paper is an even square.  Place it as a diamond in front of you, white side up. Make a tiny dot in the centre of your diamond to mark the midpoint.

Step 2: Fold in both side corners so the tip meets in the centre. Fold down the top corner so that it slightly falls over the side folds, press it down to make a crease and lift it back up.

Step 3: Fold up the bottom corner so that the tip is about one inch away from the crease you just made.

Step 4: Roll your double sided tape on the highlighted areas then press down folding the top half into the envelope. Tada! Now you have a pretty envelope!! Repeat this 13 more times to make 14 envelopes. I choose to make 14 because it seemed fitting for Valentine's Day .


How to make a label:
To make the labels I used Avery glossy white square labels which I purchased at target a little while back. They most likely carry it at Wal-Mart or Michaels. You can feel free to use any labels . This brand was amazing. Each sheet had 12, 2 inch square labels which you could design and customize using the AVERY.CA website. I essentially went on the site, typed in the template number (22806) and it allowed me to choose the label design, customize what I want to write on each individual label and then print. Even for someone not very tech savvy this was super easy!


Here are some ideas for what to write on the envelope labels:

Open When ....
1. You feel lonely
2. You miss me
3. You need a good laugh
4. You are feeling stressed
5. You need a confidence boost
6. You can't sleep
7. You are happy
8. You need a study break
9. You are having a bad day
10. You need motivation


Now all you have to do is write all your mushy lovey dovey letters, slip them in your envelopes. Place tissue paper in the bottom of your box, place the letters inside and your love letterbox is complete. It is a time consuming gift but it will put a huge smile on someone's face which makes it all worth it.

Monday, January 26, 2015

Tinting Your Mason Jars for a Candle Holder DIY by Glitter

What you need:

  • Wax Paper
  • Paper Towel
  • Baking Pan
  • Food Colouring
  • Mason Jars
  • Mod Podge
  • Candles
  • Oven
  • Straw or Stirring Stick
  • Disposable Plastic Cups


This DIY is very simple and cheap that will make some cute candle holders for your outdoor or indoor decor! First get all your materials together. Most of these materials you can find within your home just like I did. Only thing I needed to buy was the Mod Podge which was $8.97 for an 8 oz jar at Wal Mart. For things you may not have such as the mason jars, you can buy a 6 pack at Wal Mart for $12. I used different sizes to give a little more of a dynamic effect! Next, it is time to mix your colours. I used different hues of purples to match my decor, but you can use any colours your little heart desires! Your going to take your mod podge and pour it into the disposable plastic cup and add some food colouring to it, don't be afraid to get creative! If you decide to use different colours completely, use different cups for each colour so your colours don't mix. Then take your straw and stir away to make sure it is completely mixed together. Now you pour your mixture into the first mason jar and start turning the jar to allow the mixture to roll through the entire jar. Once all the inside of the mason jar is covered by the mixture, carefully turn it upside down to place it on your baking pan with the paper towel laid down first, then the wax paper. Repeat all the above steps to as many mason jars you would like. You can either change the colour of each mason jar or keep the same colour, depending on what you prefer! After all your mason jars are coloured, and turned over onto the baking sheet, let the jars sit for one hour for it to set. After the hour has passed, turn the jars right side up on a new clean piece of wax paper, set your oven to 225 °Fand put the jars in there for 45 minutes. Once the jars are finished baking, carefully take out the pan out of the oven and let them cool throughly, and you can use them right away!
There you have it! Your very own, homemade mason jar candle holders! 
Below are a few time lapsed videos of the process and how they will turn out. Post your comments, and questions below and be sure to follow us on Twitter, Facebook, Instagram, and Pinterest for all of our easy DIYs with videos and pictures. Don't be afraid to share your DIY's with us!


Wednesday, January 21, 2015

Perk Up Your Wine Glasses DIY By Glue


What You Need:
  •  Scissors
  •  Foam brush
  •  Mod Podge (Glossy)
  • 6-8 Wine Glasses
  • Glass Cleaner
  •  Pen
  • 1 Sheet of Scrapbook Paper with desired pattern (I used a black damask pattern)


Directions:

Step 1: Gather all the materials and tools listed above. I purchased the mod podge and foam brushes from Michaels Arts & Crafts store. To start, trace out the base of each wine glass on the sheet of scrapbook paper. I choose to use a set of 6 multi size wine glasses. Nothing fancy, I just used cheap ones I had sitting in the back of my cabinet which you can easily find at Dollarama.
Step 2: Once you have traced out the base of each wine glass on the sheet of scrapbook paper cut them out. Cut along the inside of your outline so that the circle is slightly smaller than the base of your glass. After cutting out all your circles place your wine glasses upside down and check to ensure that each cut out is properly sized. Make adjustments if needed. 
Step 3:Keep your wine glasses upside down.  It is almost time to start mod podging, but first use a glass cleaner (I used Windex) to clean the base of your wine glasses. Now you can grab your foam brush, dip it in the mod podge and paint a thin layer on each base. You will need to do this two to three times, waiting about 2 minutes between each layer for it to dry. I know it looks like a gluey mess right now, don't be worried, the mod podge will dry clear within 24 hours. Yes I said 24 hours!  This project will need to dry overnight.

Step 4: Now that you have waited patiently gently press your paper circle down on the base of the wine glass, smoothing out any creases or air pockets.  

Step 5: Apply two more thin layers of modge podge on top of the paper circle base waiting 2 minutes between each layer. It will look something like this.


Step 6: Give it 24 hours to dry completely clear. Lastly, enjoy your new and improved wine glasses! 


Makeup Brush Organizer DIY by Glitter

Do you ever find that your makeup brushes never look pretty or organized in your drawers, makeup bags or all over the bathroom counter? Well here is a cute little DIY, that is cheap, easy and will help you stay organized while you are doing your makeup! First things first, the supplies you will need will be, of course your makeup brushes to put in the finish product, but to make this brush vase you will need a short square glass vase, and little pebbles. Depending on your décor in your bathroom you can use colourful pebbles, or keep it simple and use the clear ones. Now the best part of it all, it will cost you under $10, and only three simple steps! All these materials you will and can find are at your nearest dollar store! Now lets get started! 

What you will need: 

  • Square Glass Vase 
  • Pebbles
  • Makeup Brushes 

Step 1: Now get all your materials ready and start putting it all together! I also added some bling around the edges just to make it more pretty!

Step 2: Before anything make sure you wash the vase for it to be clean and clear. Next, pour your pebbles into the vase, if they are the little ones like mine, pour it slow so they don’t go everywhere!


Step 3: After that, just simply start putting your brushes in the pebbles in any order you like and they stand up straight and stay there.      


Now you have yourself a cute, organized brush holder and no longer have a messy brush drawer or makeup bag! Enjoy!