Showing posts with label Crafting. Show all posts

Tuesday, February 10, 2015

DIY Valentines Day Man Bouquet by Glue

Valentine's day is around the corner and it is always so hard to find an appropriate gift for a guy. Seeing as how there aren't very many male flower lovers out there I thought this idea was so perfect. A man bouquet is a sweet gesture and it won't break the bank. This gift is also very customizable so you can change it up to meet the liking's of any man.

What you need :
  •  glue gun
  • glue sticks
  • green masking tape
  • green tissue paper
  •  styrofoam ball
  • plant pot
  • wood skewer sticks
  •  scissors

Items inside the bouquet:
  • Hershey's
  • Snickers
  • Kit-Kat
  •  M&M's
  • Canadian Club Whiskey (mini)
  • Polar Ice Vodka (mini)
  • cigar
  • 5 heart shaped chocolates
  • 2 Kraken black spiced rum (mini)
  • 3 lotto scratch cards
Step 1:Lay out all your items. Match the number of skewer sticks to the number of items. (Note: For larger items like the whiskey and vodka you may need two sticks). Try to visualize how you want your items arranged in the man bouquet. It helps to draw out a rough sketch on paper. Items in the front should be shorter so adjust the length of the stick by cutting it.

Step 2: Cut a piece of tape an inch shorter than your skewer stick, place the stick on the edge of the tape and roll it, leaving the pointy side uncovered. Do this to all of your sticks. They should resemble green flower stems like this.

Step 3: Heat your glue gun, place each of your items face down and glue a stick to the back of each. Put the items aside to let the glue dry completely.

Step 4: Squirt a big blob of glue at the bottom of your pot, scrunch up two pieces of tissue paper and secure them to the bottom of the pot. Cover half of the Styrofoam ball with hot glue and firmly hold it in place inside the pot. This is so the ball doesn't spin around or tilt.

Step 5: Now you can add all your items to the bouquet. Refer back to your sketch so you aren't blindly stabbing the ball with skewer sticks. Start with the larger items and then add in the smaller ones. You can adjust the height of the stick by pushing deeper or less deep.

Step 6: Weave the green tissue paper through the sticks to cover all traces of the ball and glue in place. Lastly, heavier items like the spiced rum glass bottles that can't stand on a stick, can stand alone on the tissue paper.

There you have it! Your very own man bouquet that he will love and appreciate for Valentines day, that doesn't break the bank or scream sappy!
Remember you are not limited to booze and chocolate!
You can also try:
·         beef jerky
·         pictures
·         rolled up socks/boxers
·         cards
·         giftcards
·         gum
·         tools
·         deodorant
·         mini cologne
·         razors


Monday, January 26, 2015

Tinting Your Mason Jars for a Candle Holder DIY by Glitter

What you need:

  • Wax Paper
  • Paper Towel
  • Baking Pan
  • Food Colouring
  • Mason Jars
  • Mod Podge
  • Candles
  • Oven
  • Straw or Stirring Stick
  • Disposable Plastic Cups


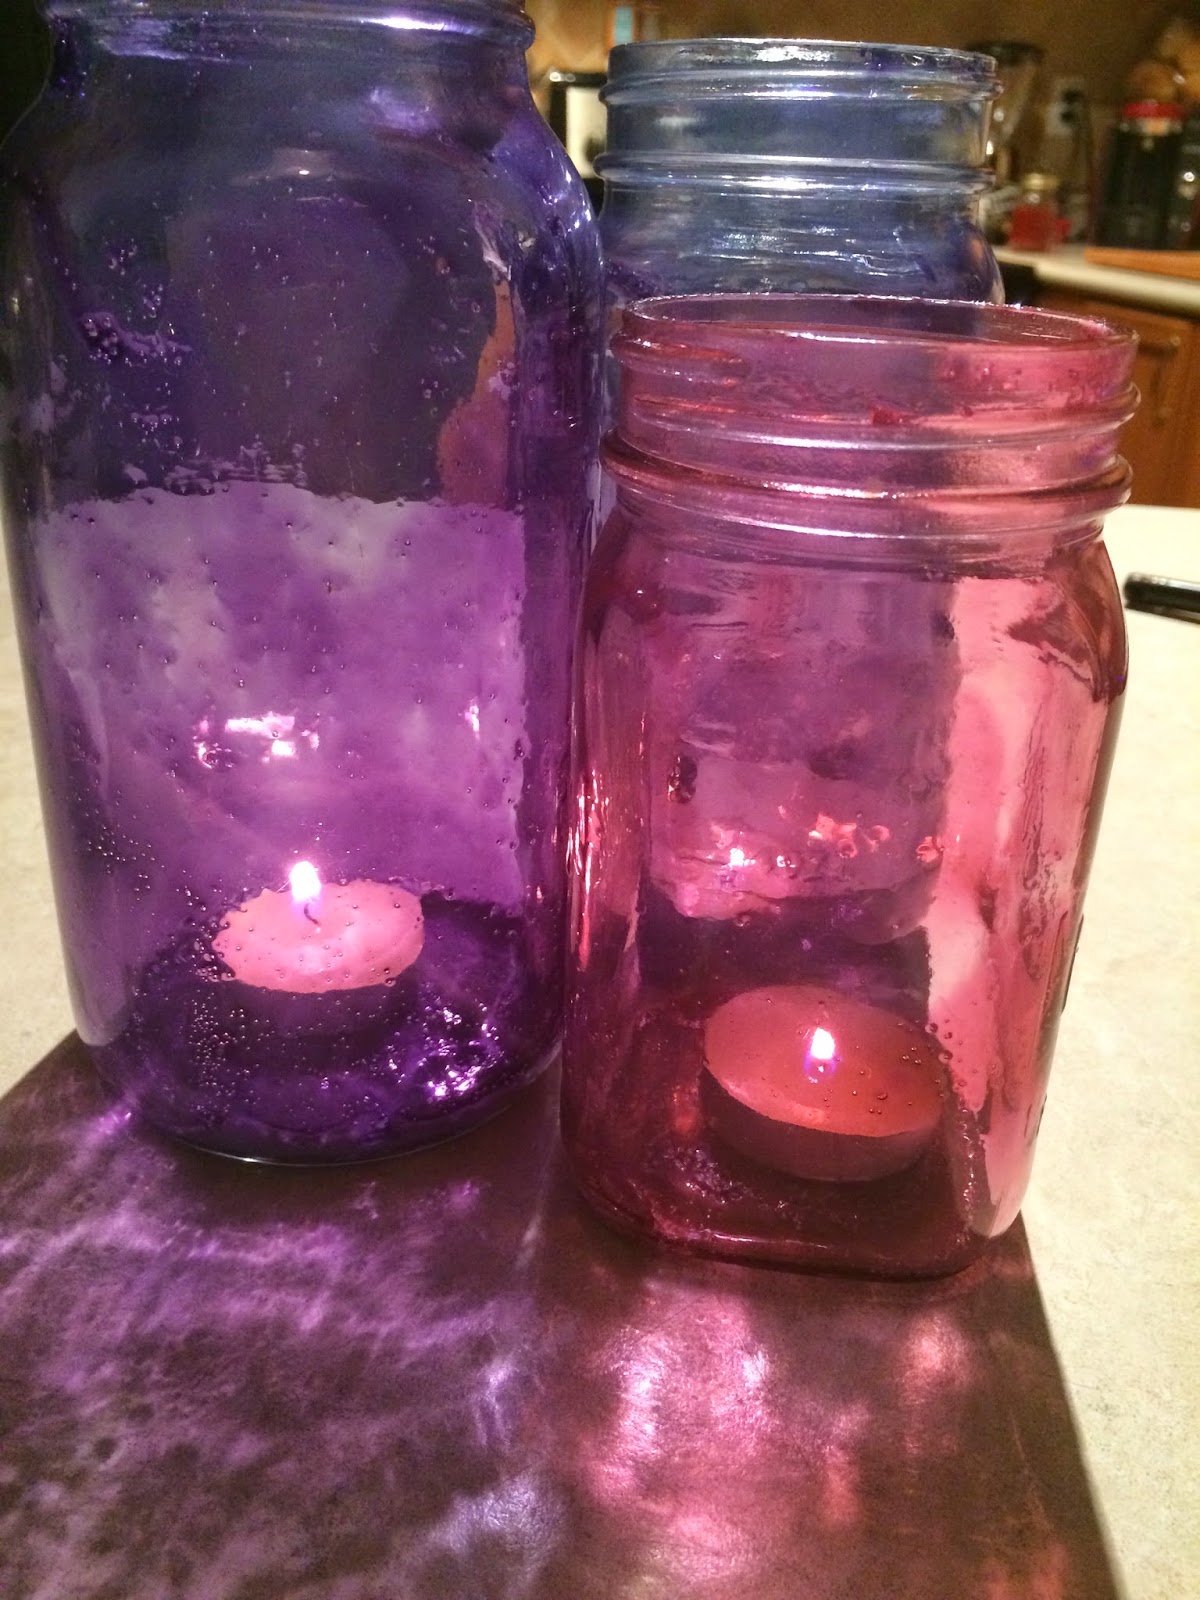
This DIY is very simple and cheap that will make some cute candle holders for your outdoor or indoor decor! First get all your materials together. Most of these materials you can find within your home just like I did. Only thing I needed to buy was the Mod Podge which was $8.97 for an 8 oz jar at Wal Mart. For things you may not have such as the mason jars, you can buy a 6 pack at Wal Mart for $12. I used different sizes to give a little more of a dynamic effect! Next, it is time to mix your colours. I used different hues of purples to match my decor, but you can use any colours your little heart desires! Your going to take your mod podge and pour it into the disposable plastic cup and add some food colouring to it, don't be afraid to get creative! If you decide to use different colours completely, use different cups for each colour so your colours don't mix. Then take your straw and stir away to make sure it is completely mixed together. Now you pour your mixture into the first mason jar and start turning the jar to allow the mixture to roll through the entire jar. Once all the inside of the mason jar is covered by the mixture, carefully turn it upside down to place it on your baking pan with the paper towel laid down first, then the wax paper. Repeat all the above steps to as many mason jars you would like. You can either change the colour of each mason jar or keep the same colour, depending on what you prefer! After all your mason jars are coloured, and turned over onto the baking sheet, let the jars sit for one hour for it to set. After the hour has passed, turn the jars right side up on a new clean piece of wax paper, set your oven to 225 °F, and put the jars in there for 45 minutes. Once the jars are finished baking, carefully take out the pan out of the oven and let them cool throughly, and you can use them right away!
There you have it! Your very own, homemade mason jar candle holders! 
Below are a few time lapsed videos of the process and how they will turn out. Post your comments, and questions below and be sure to follow us on Twitter, Facebook, Instagram, and Pinterest for all of our easy DIYs with videos and pictures. Don't be afraid to share your DIY's with us!


Wednesday, January 21, 2015

Perk Up Your Wine Glasses DIY By Glue


What You Need:
  •  Scissors
  •  Foam brush
  •  Mod Podge (Glossy)
  • 6-8 Wine Glasses
  • Glass Cleaner
  •  Pen
  • 1 Sheet of Scrapbook Paper with desired pattern (I used a black damask pattern)


Directions:

Step 1: Gather all the materials and tools listed above. I purchased the mod podge and foam brushes from Michaels Arts & Crafts store. To start, trace out the base of each wine glass on the sheet of scrapbook paper. I choose to use a set of 6 multi size wine glasses. Nothing fancy, I just used cheap ones I had sitting in the back of my cabinet which you can easily find at Dollarama.
Step 2: Once you have traced out the base of each wine glass on the sheet of scrapbook paper cut them out. Cut along the inside of your outline so that the circle is slightly smaller than the base of your glass. After cutting out all your circles place your wine glasses upside down and check to ensure that each cut out is properly sized. Make adjustments if needed. 
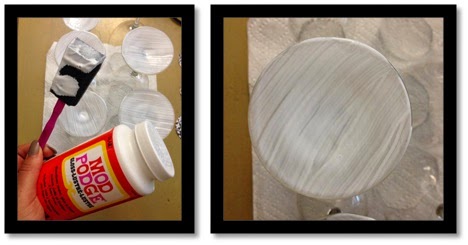
Step 3:Keep your wine glasses upside down.  It is almost time to start mod podging, but first use a glass cleaner (I used Windex) to clean the base of your wine glasses. Now you can grab your foam brush, dip it in the mod podge and paint a thin layer on each base. You will need to do this two to three times, waiting about 2 minutes between each layer for it to dry. I know it looks like a gluey mess right now, don't be worried, the mod podge will dry clear within 24 hours. Yes I said 24 hours!  This project will need to dry overnight.

Step 4: Now that you have waited patiently gently press your paper circle down on the base of the wine glass, smoothing out any creases or air pockets.  

Step 5: Apply two more thin layers of modge podge on top of the paper circle base waiting 2 minutes between each layer. It will look something like this.


Step 6: Give it 24 hours to dry completely clear. Lastly, enjoy your new and improved wine glasses! 


Makeup Brush Organizer DIY by Glitter

Do you ever find that your makeup brushes never look pretty or organized in your drawers, makeup bags or all over the bathroom counter? Well here is a cute little DIY, that is cheap, easy and will help you stay organized while you are doing your makeup! First things first, the supplies you will need will be, of course your makeup brushes to put in the finish product, but to make this brush vase you will need a short square glass vase, and little pebbles. Depending on your décor in your bathroom you can use colourful pebbles, or keep it simple and use the clear ones. Now the best part of it all, it will cost you under $10, and only three simple steps! All these materials you will and can find are at your nearest dollar store! Now lets get started! 

What you will need: 

  • Square Glass Vase 
  • Pebbles
  • Makeup Brushes 

Step 1: Now get all your materials ready and start putting it all together! I also added some bling around the edges just to make it more pretty!

Step 2: Before anything make sure you wash the vase for it to be clean and clear. Next, pour your pebbles into the vase, if they are the little ones like mine, pour it slow so they don’t go everywhere!


Step 3: After that, just simply start putting your brushes in the pebbles in any order you like and they stand up straight and stay there.      


Now you have yourself a cute, organized brush holder and no longer have a messy brush drawer or makeup bag! Enjoy!